Instructions
Upgrade Windows Home to Pro: Step-by-Step Guide
Upgrading from Windows Home to Pro unlocks advanced features like BitLocker encryption, Remote Desktop, and enhanced security options, making it ideal for professionals and businesses. This step-by-step guide will walk you through checking your current Windows edition, upgrading to Pro using a generic key, and activating your new version. Follow these simple instructions to complete the upgrade seamlessly and enjoy the full benefits of Windows 11 Pro.
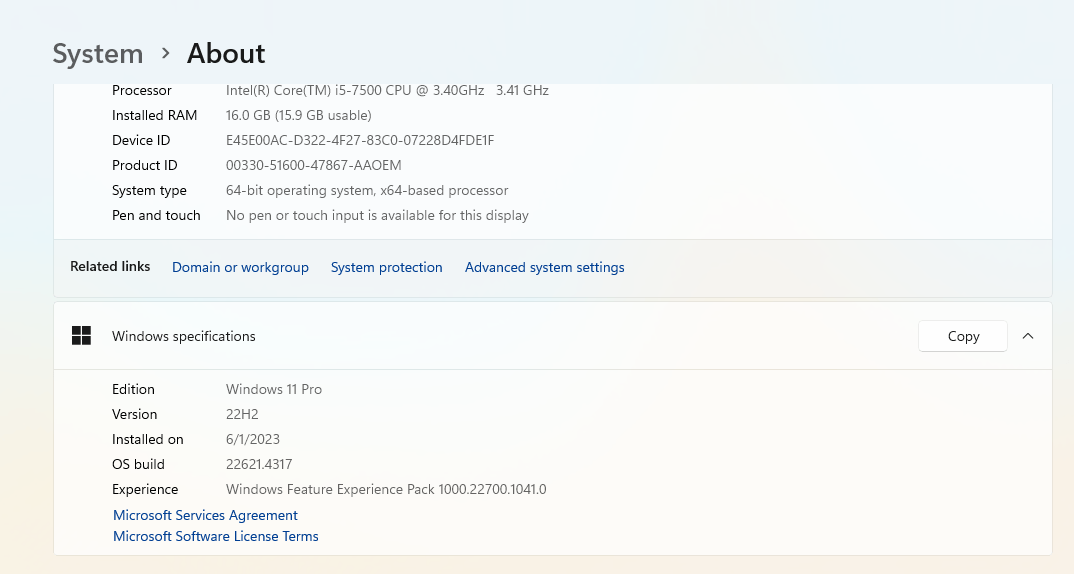
Step 1: Verify Your Windows Edition
Before proceeding with the upgrade, check your current Windows edition:
- Press Win + I to open Settings.
- Navigate to System > About.
- Under Windows specifications, find the Edition.
- If it displays Windows Home, you are eligible to upgrade to Pro.
Note: If you need to download Windows 10 or 11, select the appropriate option below.
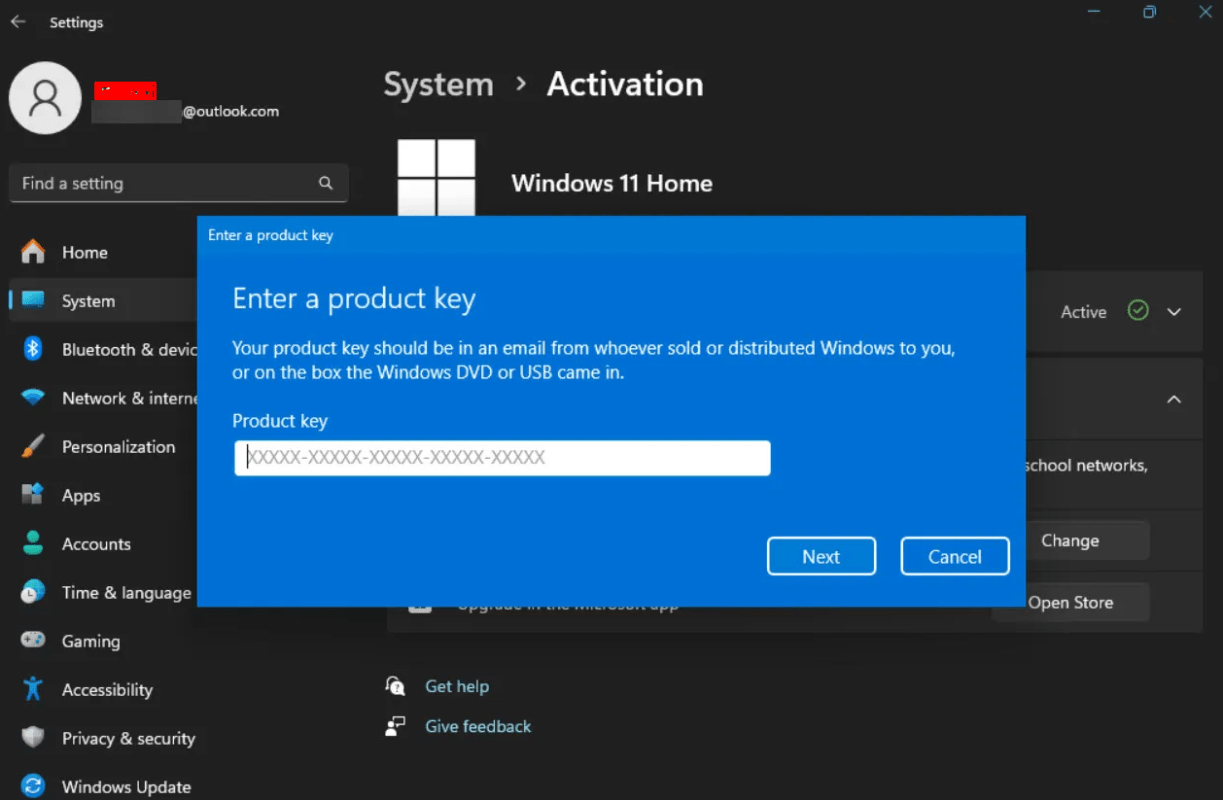
Step 2: Upgrade to Windows Pro
If your device is running Windows Home, follow these steps to upgrade:
- Open Settings > System > Activation.
- Enter one of the generic upgrade keys:
- VD4D4-NDBGX-MTQ2D-G2D9B-F9CKG
- VK7JG-NPHTM-C97JM-9MPGT-3V66T
- Click Next, then select Start Upgrade.
- Wait while your system upgrades to Windows 11 Pro.
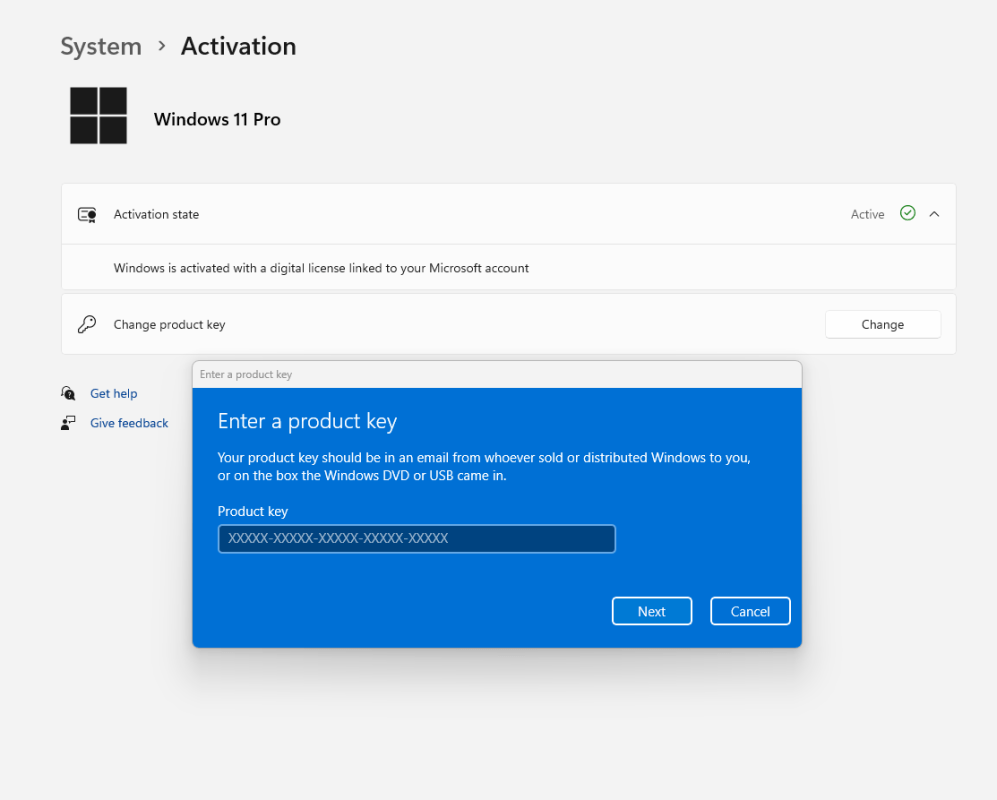
Step 3: Activate Windows Pro
Once the upgrade is complete, activate your new edition:
- Return to Settings > System > Activation.
- Enter your valid Windows 11 Pro key.
- Click Activate to complete the process.
- Restart your PC to apply the changes.
Troubleshooting and Activation Support
If you experience any issues during activation or need assistance, our support team is here to help. Reach out to us anytime via live chat at https://officedigital.io/ or email us at [email protected]. We’re available 24/7 to ensure a smooth setup process.