Instructions
How to Enable Hyper-V in Windows 11
Mar
Hyper-V is Microsoft’s built-in virtualization platform in Windows 11. It lets you create and run virtual machines (VMs) – perfect for testing software, running other operating systems, or isolating environments.
In this guide, you’ll learn how to enable Hyper-V in Windows 11, including BIOS setup, Windows features, and common fixes.
What Is Hyper-V?
Hyper-V allows you to run multiple operating systems on one PC by creating virtual machines.
You can use it to:
- Run Linux on Windows
- Test apps safely
- Create isolated environments
- Use Windows Sandbox
Requirements for Hyper-V
Before enabling Hyper-V, make sure your system meets these requirements:
- Windows 11 Pro / Enterprise / Education
- 64-bit CPU with virtualization support
- Virtualization enabled in BIOS
- At least 4GB RAM (8GB recommended)
Hyper-V is not available on Windows 11 Home (unless using workarounds).
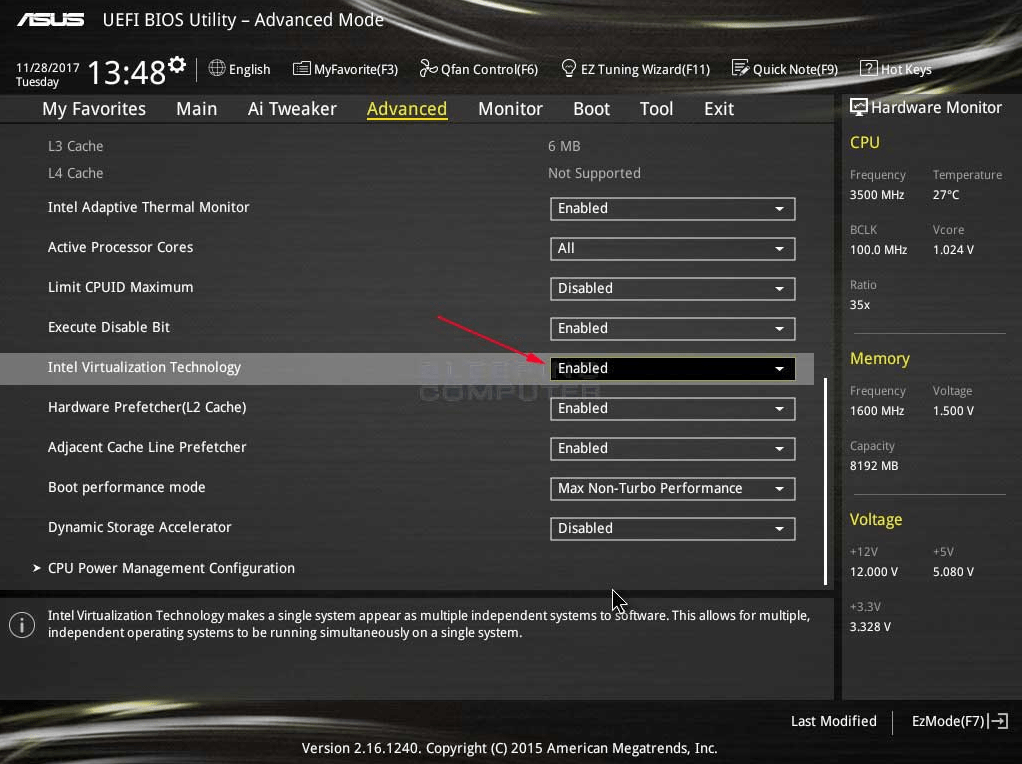
Step 1: Enable Virtualization in BIOS
Hyper-V requires virtualization to be enabled.
Steps
- Restart your PC
- Enter BIOS (see How to Enter BIOS in Windows 11)
- Enable:
- Intel: Intel Virtualization Technology (VT-x)
- AMD: SVM Mode
- Save changes and restart
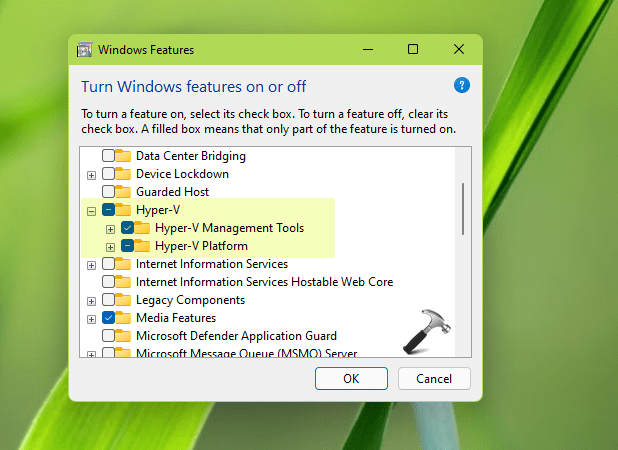
Step 2: Enable Hyper-V in Windows Features
Now enable Hyper-V inside Windows.
Steps
- Press Windows + R → type: optionalfeatures
- Find Hyper-V
- Check:
- Hyper-V Management Tools
- Hyper-V Platform
- Click OK
- Restart your PC
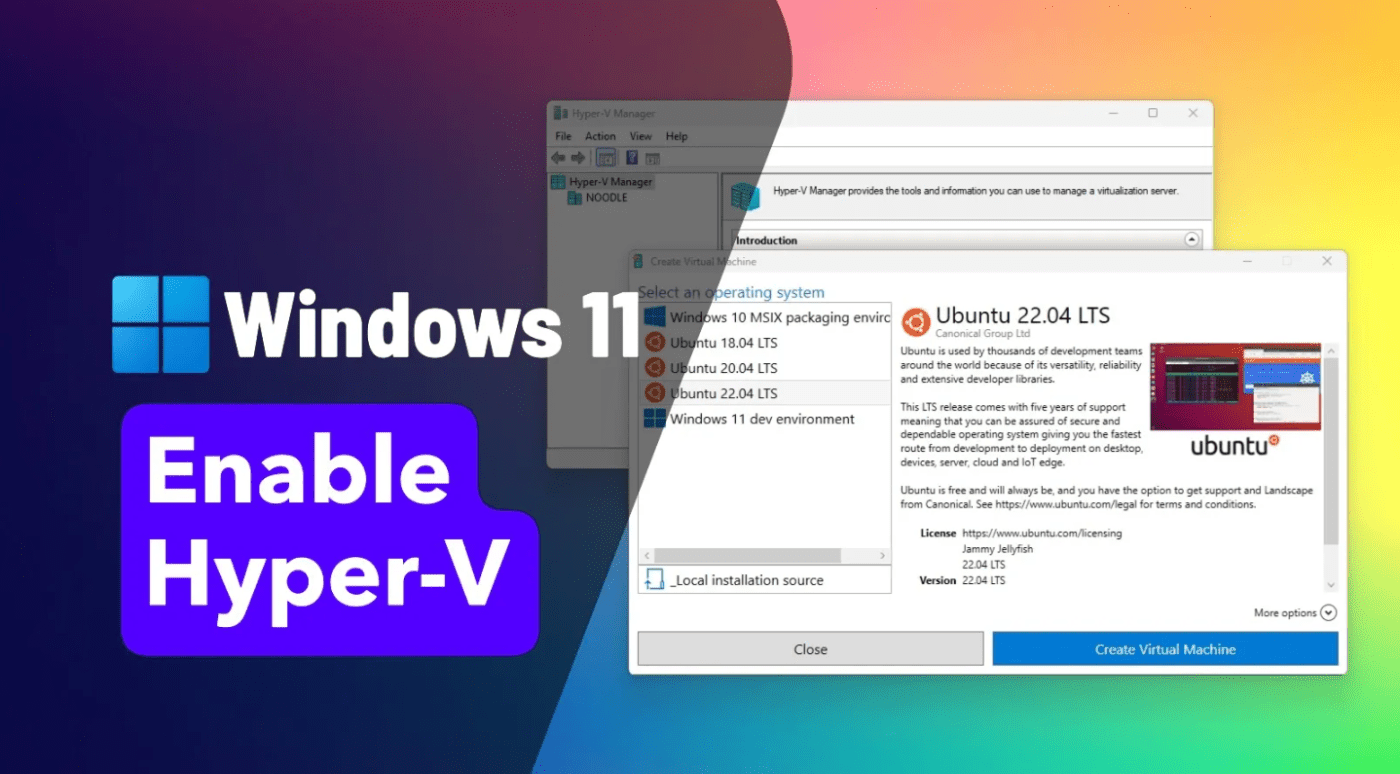
Step 3: Open Hyper-V Manager
Steps
- Open Start Menu
- Search for Hyper-V Manager
- Launch the app
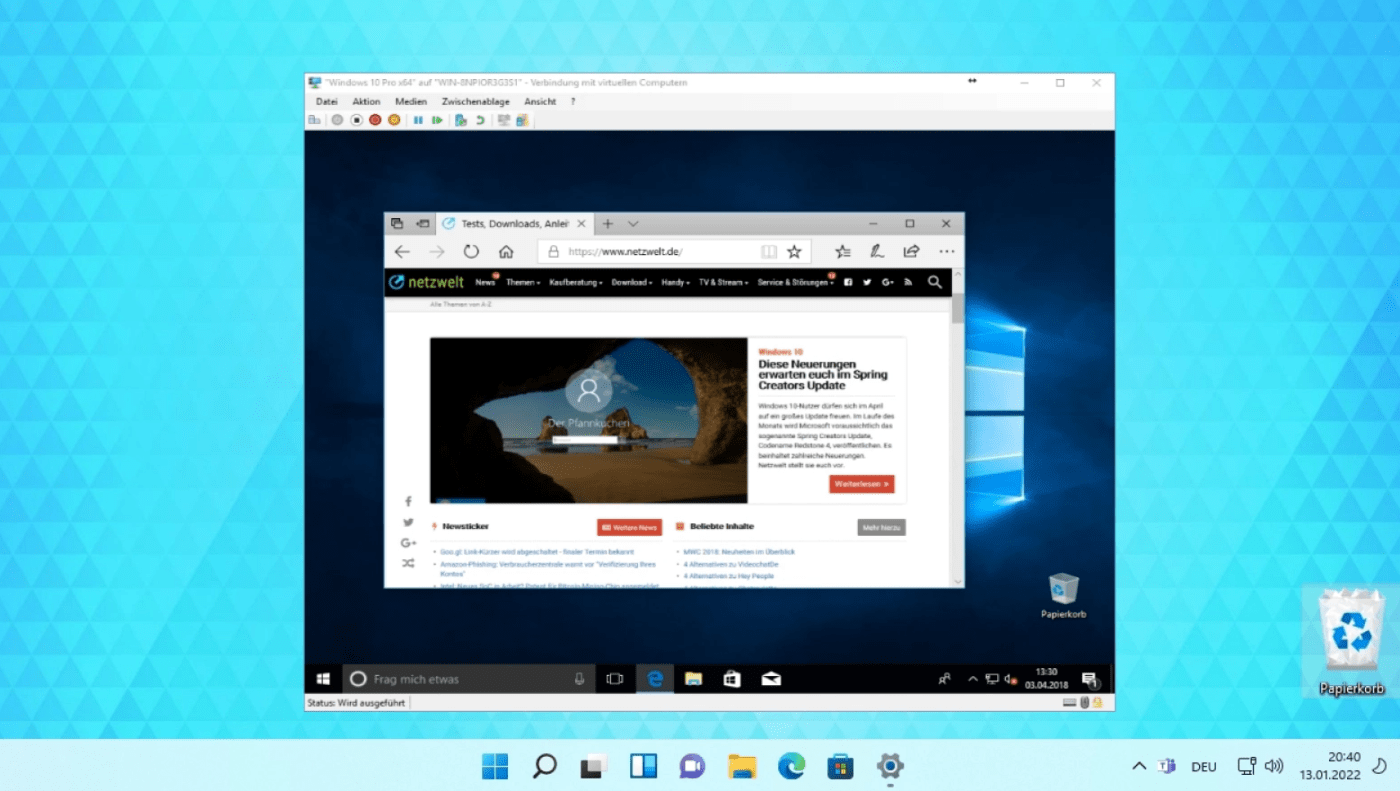
You can now create and manage virtual machines.
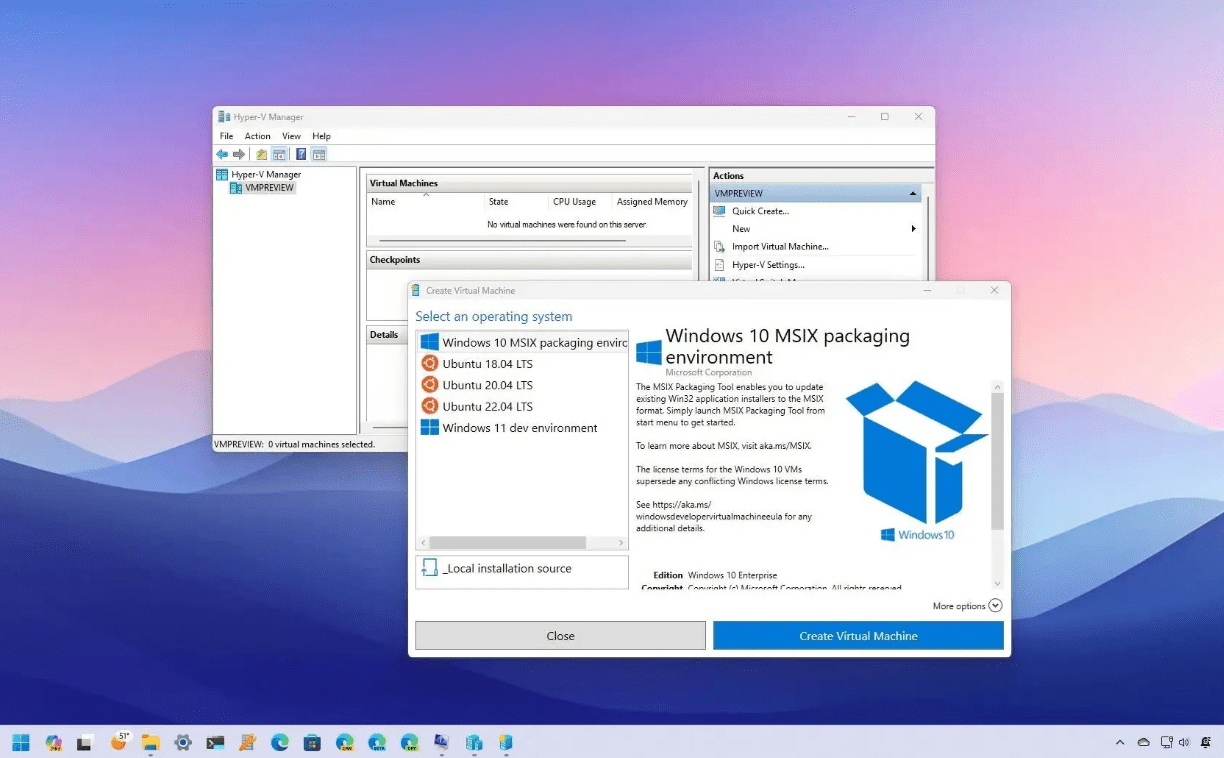
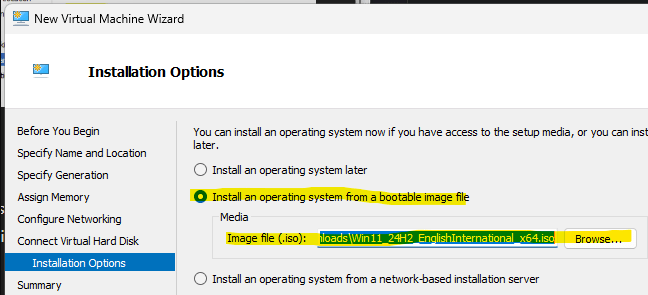
Step 4: Create Your First Virtual Machine
Steps
- Open Hyper-V Manager
- Click New → Virtual Machine
- Follow the wizard:
- Choose name
- Allocate RAM
- Select storage
- Add ISO file
- Click Finish
Hyper-V Not Showing? Fix
If Hyper-V is missing:
Check Windows Edition
- Requires Windows 11 Pro or higher
Enable via Command Line
Run Command Prompt as admin:
dism /online /enable-feature /all /featurename:Microsoft-Hyper-V
Update Windows
- Install latest updates
Benefits of Using Hyper-V
- Run multiple OS on one PC
- Safe testing environment
- No need for third-party software
- Built-in Windows feature
Enabling Hyper-V in Windows 11 allows you to create virtual machines and unlock powerful virtualization features. By enabling virtualization in BIOS and turning on Hyper-V in Windows Features, you can start using VMs in minutes.
If you’re setting up a fresh system, don’t forget to activate Windows using a genuine Windows 11 Pro product key from our store.