
Instructions
How to Add Citations and Bibliography in Word
May
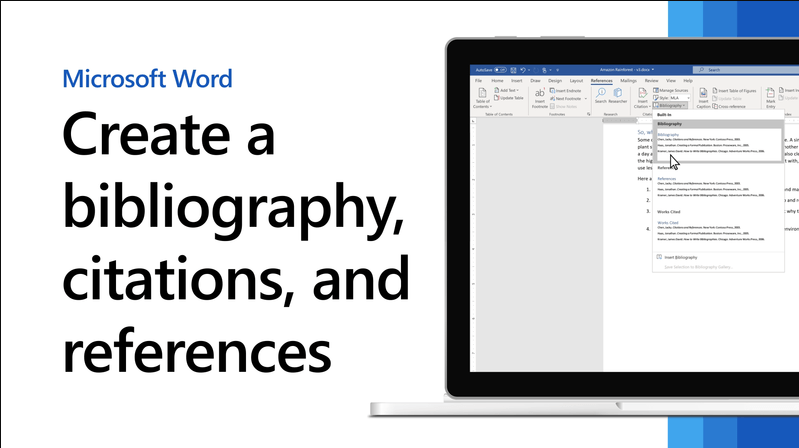
Word includes built-in tools for managing citations, sources, and bibliographies, which makes it useful for essays, research papers, reports, and other academic writing. Microsoft says you can choose a citation style, add sources, insert citations into the text, and then generate a bibliography from the sources used in the document.
This is helpful because once a source is added, you do not have to type it again every time you cite it. Microsoft also says Word can update the bibliography later if you add more sources after the bibliography has already been inserted.
Step 1: Choose a Citation Style
Before inserting citations, choose the citation format you need.
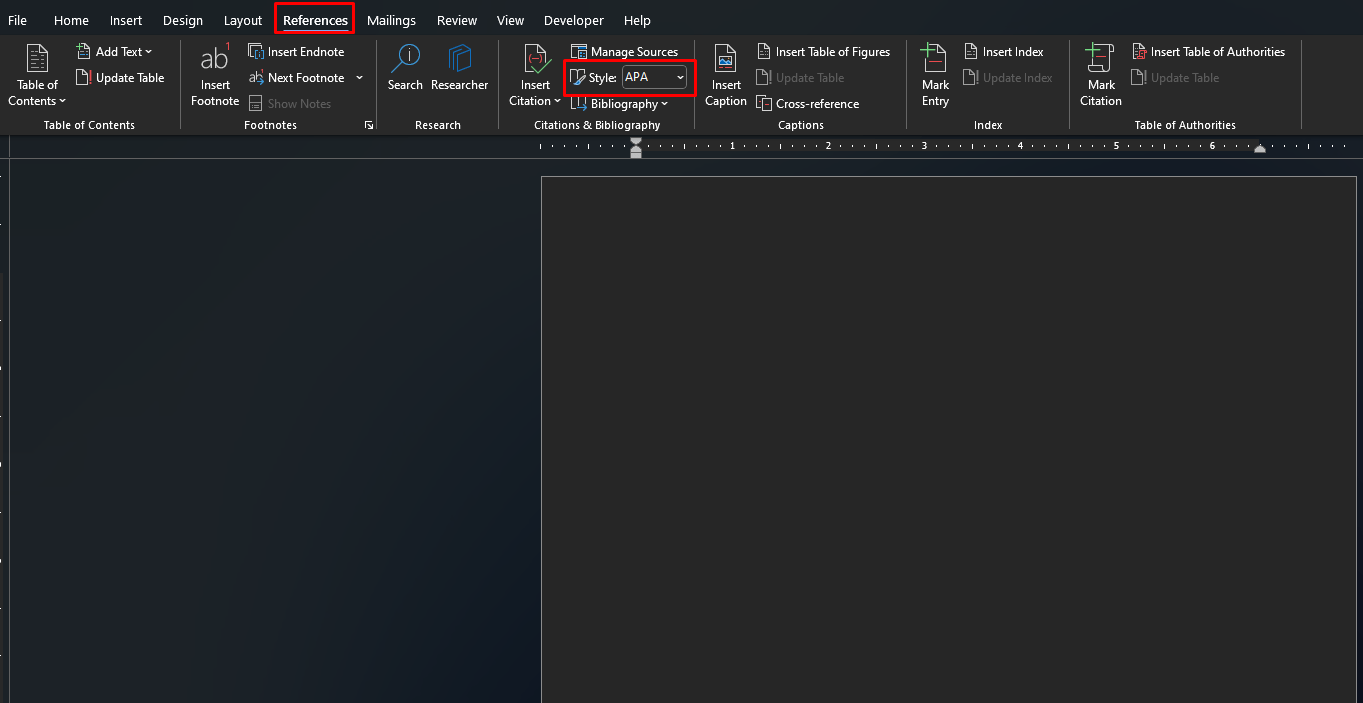
Microsoft says to go to References > Style and select the style you want, such as APA, MLA, or Chicago. It also notes that social sciences documents often use MLA or APA styles.
This matters because Word formats the citation and bibliography based on the selected style.
Step 2: Add a New Citation in Word
Once the style is selected, you can insert the citation.
Microsoft says to place the cursor at the end of the sentence or phrase you want to cite, then go to References > Insert Citation. From there, choose Add New Source.
Step 3: Enter the Source Information
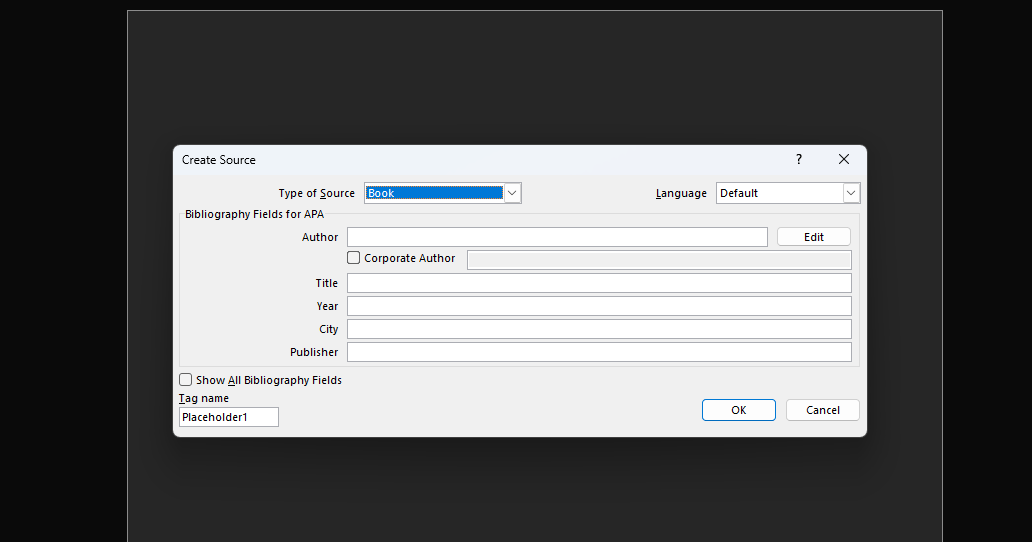
After choosing Add New Source, Word opens the Create Source dialog.
Microsoft says you should select the Type of Source and then fill in the source information. It specifically notes that you can choose source types such as a book section or a website.
This is useful because Word stores the source in your list, so you can cite it again later without re-entering all the details.
Step 4: Reuse an Existing Source
If you already added the source once, you do not need to create it again.
Microsoft says that once a source has been added to your list, you can return to References > Insert Citation and select that source from the list.
This saves time when the same source is cited multiple times in a paper.
Step 5: Add a Placeholder if You Do Not Have Full Details Yet
Sometimes you know you need a citation, but you do not have the complete source details yet.
Microsoft says you can choose Add New Placeholder from the Insert Citation menu. Word then adds a placeholder source, and a question mark appears next to it in Source Manager until the details are filled in later.
This is useful for:
- rough drafts
- research in progress
- papers where source details are still being collected
Step 6: Create the Bibliography
After you have cited your sources, you can insert the bibliography.
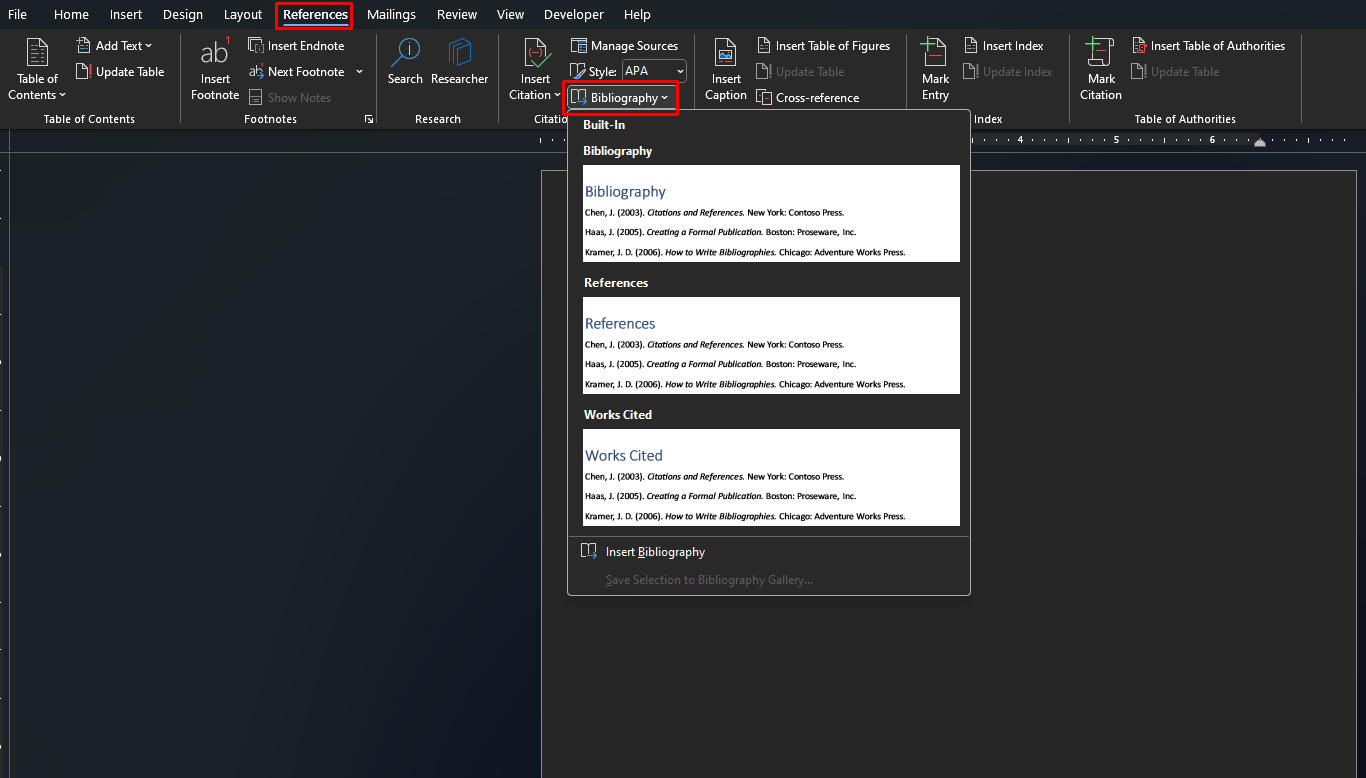
Microsoft says to place the cursor where you want the bibliography, usually near the end of the document, then go to References > Bibliography and choose a format.
Word then generates the bibliography from the sources already cited in the document.
Step 7: Update the Bibliography Later
If you add more citations after creating the bibliography, Word can refresh it.
Microsoft says you can click anywhere in the bibliography and choose Update Citations and Bibliography to bring in the new sources.
This is one of the biggest advantages of using Word’s built-in citation tools instead of typing everything manually.
How to Manage Sources in Word
If you need to edit, delete, or organize your source list, Word includes source management tools.
Microsoft says you can use Manage Sources to add, edit, or delete sources in your list. It also says that to edit a source, you can go to References, open the citations pane or source manager, select the source, and choose Edit Source.
This is useful if:
- a source detail is wrong
- you need to correct an author name
- you want to update publication information
- you want to remove sources you no longer use
How to Change Citation Style Later
You do not have to rebuild the whole bibliography if the teacher or document format changes.
Microsoft says you can change the citation style in Word, and all the references in the document’s bibliography change to the new style automatically.
This is very useful if you start writing in one format and later need to switch from:
- APA to MLA
- MLA to Chicago
- another supported style to a different one
Bibliography vs Works Cited in Word
Word can insert more than one type of source list.
Microsoft says a works cited list is a list of all works you referred to and is typically used with MLA, while a bibliography is a list of all works you consulted while researching and writing. Word lets you choose Bibliography or Works Cited from the bibliography menu.
This matters if you want the label and format to match the required writing style.
FAQ
How do I add citations in Word?
Microsoft says to place the cursor where you want the citation, go to References > Insert Citation, and choose Add New Source.
How do I create a bibliography in Word?
Microsoft says to place the cursor where you want the bibliography, then go to References > Bibliography and choose a format.
Can I change citation style in Word later?
Yes. Microsoft says that if you change the style, all the references in the bibliography change to the new style automatically.
What is the difference between bibliography and works cited in Word?
Microsoft says a works cited list contains all works you referred to and is typically used with MLA, while a bibliography lists all works you consulted while researching and writing.
Write smarter with genuine Office keys, instant delivery, and easy activation that gives you the tools you need for polished documents and better productivity.